To select a control you must first exit draw mode. To exit draw mode, click on the [Select Mode] button in the toolbar or press (Esc) on your alphanumeric keyboard. Next select a control on the Page workspace or click on the control's name in Object Browser.
While in Select Mode, you can select multiple controls:
Note: Press and hold (Ctrl) while clicking on a selected control to deselect it from the existing selection.
A parent object can be defined as any frame, tab, pop up, and even the page itself. Parent objects have a selection context which allows you to add and select controls that fall within the parent object boundaries. You may select any and all controls within the boundary of a parent object but you cannot select multiple controls of two different parent objects at one time.
Select all controls within a selected parent object at once using the following method:
A boundary rectangle is automatically drawn around the selection and includes handles to resize the selected objects.
To delete a control:
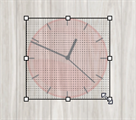
To move a control or multiple controls, you must first select them.
Note: Controls cannot be moved outside of their parent object boundary.
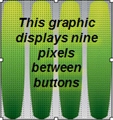
Note: If the Show Grid is enabled, the selected control(s) will snap to the nearest grid point, whether dragging them with the mouse or nudging them with the cursor keys.
You can use the (Shift) key as a toggle to constrain the movement of one or more controls so that they move only in a horizontal or vertical direction.
Click to select a control or multiple controls as required then press and hold the (Shift) key on your alphanumeric keyboard. Keeping the mouse button held and moving the control(s) maintains the horizontal or vertical axis for the selection. Releasing the (Shift) key will unlock the locked axis.
When controls of the same size, type, and even state are required on different pages of your configuration; you can copy and paste a control between pages.
Click to select the [Show Grid] button on the configuration toolbar to enable snap to grid functionality. Once enabled, the grid is displayed behind all controls in the Page workspace.
Grid spacing can be changed using the grid spacing box located to the right of the [Show Grid] button .
Note: Enabling snap to grid functionality will not automatically reformat or move existing controls on the page to align with the grid. Instead with this feature enabled, any new controls added to the page or any controls moved on the page will snap to the displayed grid.
Note: If multiple controls are selected, changing the size of the bounding box will retain the relative size of the selected controls. A control that is twice the size of another will still be twice as large as the other if they are resized together, regardless of their previous sizes or their new size.
To resize a control or multiple controls of varying sizes at once, changing their proportion to equal sizes, you must first select the controls to be modified. See "Selecting Controls" for detailed instruction. Controls cannot be resized larger than their parent object boundary. Once the controls are selected, use the tools in the configuration toolbar to resize and align the controls.
From left to right, the tools are:
Example: You can resize controls that have been laid out using the layout tools to fit within a bounding box. For example if you have four buttons selected and utilize the [Layout Vertical] tool, the buttons cluster together in a bounding box separated by the amount of pixels that are set in the layout spacing tool.
Tip: Right-click on a control and select "Make the Same Size" from the context menu, to set the right-clicked control to the size of a previously selected control. For example, select button 1, right-click on button 2 and select "Make the Same Size". Button 2 will change to have the exact geometry of button 1.
To lock the position of all controls in the configuration, click the [Lock Position] button in the toolbar. To unlock this control, click the [Lock Position] button again.