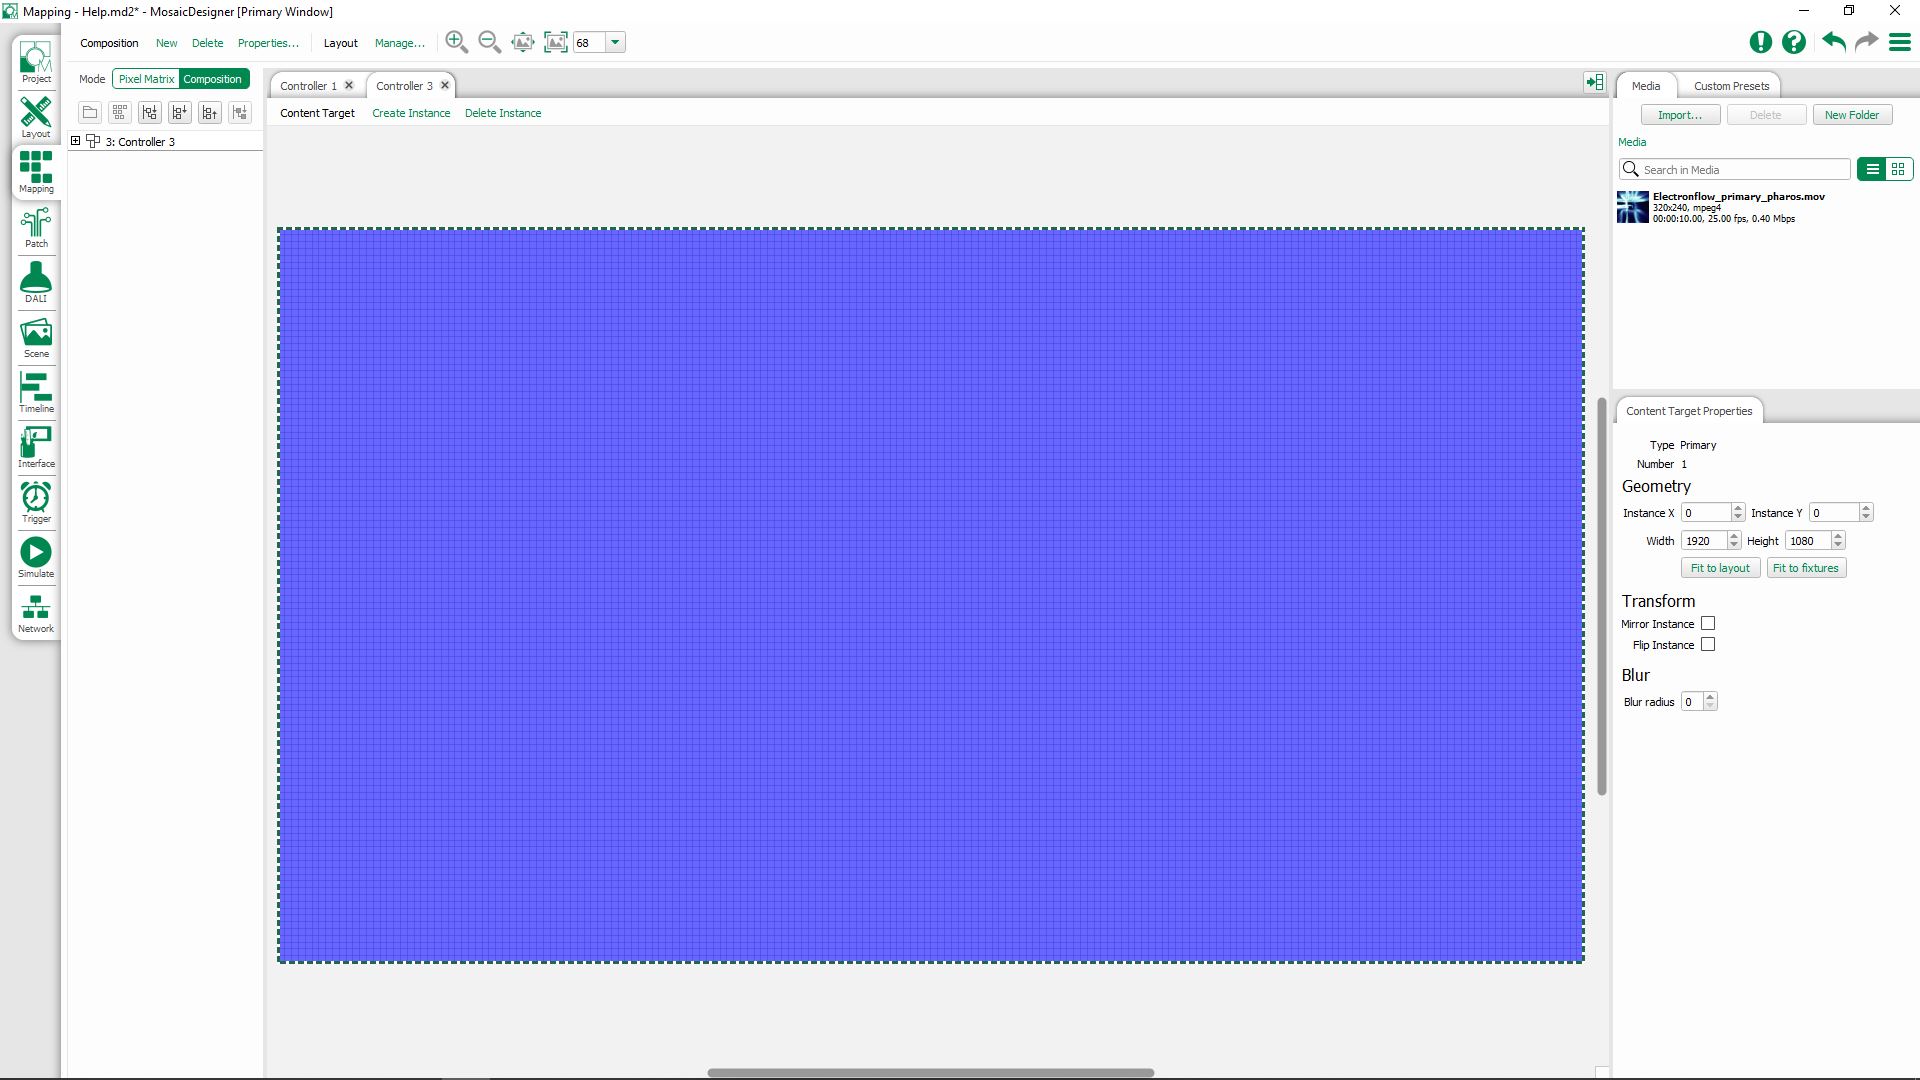
Composition Editor
In Composition mode, you can adjust the video composition for a Atlas/Atlas Pro. The composition allows you to setup the Content Targets for the Atlas/Atlas Pro.
This Content Target is used to specify where video is output on the layout. Only fixtures within the Content Target will get data from media or effects being played back on the Atlas/Atlas Pro.
If you are using a Atlas Pro in your project, you will have access to 8 Content Targets within each composition (Primary, Secondary, Target 3-8).
You will also be able to add Adjustment Targets to the controller which are configured to adjust the levels of Red, Green, Blue and Intensity that are output to the area within the mask.
Compositions
A composition is a set of Content Targets that can be stored together for a controller. When adding content to the Atlas/Atlas Pro you select the composition that the preset should use.
There are two types of object that exist on a Composition:
- Content Targets
- Adjustment Targets
Within the Composition mode, the different types of Target are distinguished by their colour and border type.
| Type | Name | Colour | Border |
| Content Target | Primary | Blue | Solid |
| Secondary | Red | ||
| Target 3 | Green | ||
| Target 4 | Yellow | ||
| Target 5 | Cyan | ||
| Target 6 | Orange | ||
| Target 7 | Maroon | ||
| Target 8 | Brown | ||
| Adjustment Target | Adjustment Target | Grey | Dashed |
NOTE: The Atlas/Atlas Pro must always have at least 1 composition, you will be unable to delete the final composition.
Content Targets
By Default, your Atlas or Atlas Pro will have a single composition consisting of a Content Target, which is the size of the Atlas/Atlas Pro Layout.
If you are using a Atlas Pro, you can add a Content Target to a composition, choose the Add Content Target option, and draw the required rectangle on the layout.
There are 3 types of Content Target:
- Primary
- Secondary
- Targets 3-8
These Targets can be programmed with most presets from the Built-In preset library.
Targets 3-8 are an advanced Project Feature that must be enabled in Project Features.
The Content Target defaults to the size of the Atlas/Atlas Pro layout, but can be resized using the Content Target properties:
Instance X and Instance Y
The position of the Target on the composition.
This property is applied per instance (where appropriate).
Width and Height
The size of the Content Target.
Fit to layout and Fit to fixtures
Automatically set the size to fit the Layout size or the minimum size to bound the fixtures on the layout.
Angle
The angle of this Content Target on the Layout.
Invert
Check this to invert the rotation.
This property is applied per instance.
Rotation X and Y
The centre of rotation of the Target.
Snap to centre
Sets the Rotation X and Y properties to be the centre of the Target
Multiplier
Sets the Target to increase its Width and Height by either 1x, 2x or 4x. This is for larger canvases with widespread fixtures that do not fit into the maximum resolution of 1920 x 1080.
Mirror Instance
Mirror all content to this target instance horizontally.
This property is applied per instance.
Flip Instance
Flip all content to this target instance vertically.
This property is applied per instance.
Wrapping
The content target can be set to wrap horizontally or vertically. When the X or Y position of the target goes beyond the edge of the layout, it will wrap round to the opposite side of the layout.
Blur Radius
The Blur of the Content Target allows you to soften the content displayed on the target. The larger the Blur radius, the softer the image
Mask
Setting a Mask will allow you to adjust the shape of the Target:
None: The Target will be a rectangle of the specified size
Shape: This allows for roundness of the corners of the Target, with the option to feather the edges.
Image: This allows an image to be used for the mask. A monochrome image works best here. Black portions will be shown by the target, while White portions will not be used.
Creating Content Target Instances
Multiple instances of a Content Target can be created to output the same data to multiple areas in the composition, by selecting a Content Target and choosing Create Instance at the top of the Layout. The new instance can have different positions and mirror/flip settings, but will always be the same size as the original.
Adjustment Targets
Adjustment Targets apply to the whole controller and can be used to reduce (or increase) RGB and intensity of presets that are played back under the mask.
The settings for Adjustment Targets are much the same as for Content Targets, but also include:
Mask Gain
The Red, Green, Blue and Intensity levels for the fixtures under the Adjustment Target can be adjusted using the gain settings. This works as a multiplier on that value. The gain can be anywhere between 0.00 and 2.00. The multiplier acts on the output levels for the fixture, but these will be limited to the 0-255 range.
You can show and hide Adjustment Targets in the Mapping view, using the ![]() icon in the left hand browser.
icon in the left hand browser.