Materials in Augment3d are collections of assets that can be applied to objects. Materials can affect aspects of an object's appearance like color, texture, reflectiveness, and so on.
CAUTION: Augment3d materials are referenced data, meaning any material edits will be reflected across all objects with those materials applied.
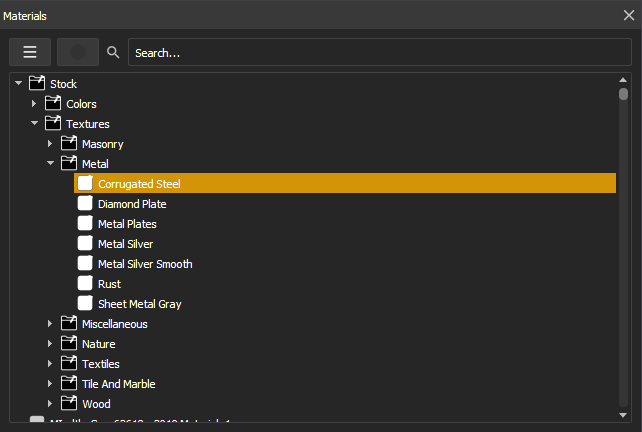
Navigating to Window > Materials will open a window with the materials library, containing all stock materials, along with any you have created or imported.
Note: Stock materials cannot be edited or deleted. To alter a stock material, duplicate it and make changes to the copy.
Search for materials using the search bar. The dropdown menu allows you to create folders for further organization, or create new materials.
Materials can be dragged from the materials library into the Augment3d scene, and dropped onto objects or object subcomponents to apply the material directly.
Selecting a material in the library will display the following options:
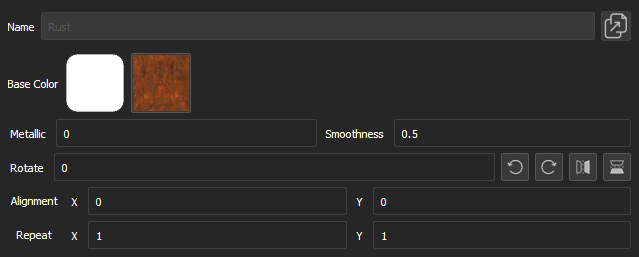
Color materials only contain a base color. Texture materials have an additional base color image, for which the following properties are available:
Accurately editing the properties above may rely on knowing the UV mapping of an object, the 2D representation of how materials are applied to the 3D surface. To aid in this, duplicate the stock UV Map texture (Stock > Textures > Miscellaneous > UV Map) and temporarily apply it to your object to see the stock mapping. Edit the properties above to test how your changes will be applied to the object with a different texture.
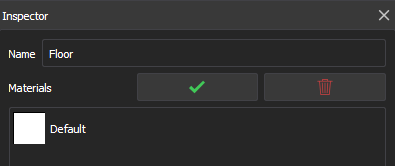
Selecting an object in the Hierarchy will display associated information in the Inspector. Selecting in the Materials field will show a list of all materials currently applied to that object.
Note: Complex objects can be expanded to view and edit the materials for the object's component parts.
Select the material to open a dropdown version of the materials library. New color materials can quickly be created using the color picker and material name options at the bottom of the dropdown.
To save changes and close the materials list, use the checkmark button. To discard changes, use the trashcan button.
Custom materials can be created by adding JPG or PNG images to a zipped folder. The images must match the following naming conventions:
If a map image is not included, the stock mapping will be used.
Materials can be imported via the Eos browser. Navigate to File > Import > Augment3d Scenic Materials, and select the desired file. A confirmation will appear for successful imports.
If a tether and a console are connected, materials can also be imported from the tether device by entering Edit Mode, navigating to File > Import to Library > Materials, and
Additional materials resources are also available on the ETC website, etcconnect.com.
CAUTION: Custom materials must be applied to an object in order to be saved with the show file. Custom materials not applied are shown in darker text and will be deleted on the shutdown of Augment3d.