Open topic with navigation
Set Control Function Dialog
-
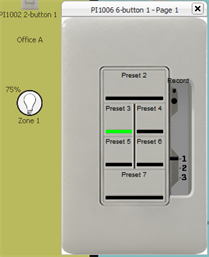
Open a station for simulation by double-clicking the station icon from within the Plan workspace, or right click on the station in the Browser and select "Open in Simulation" from the context menu. A graphical representation of the selected station displays in a new floating window.
When adding a Contact Station to the configuration, control functions are set in the Browser by first selecting the specific Contact (Input or Output) control then using the Property Editor to set the Control and Indicator Functions. To open or close a contact in the
Program / Simulate view, right-click on the contact button in simulation and select , "Open Contact" or "Close Contact" from the context menu.
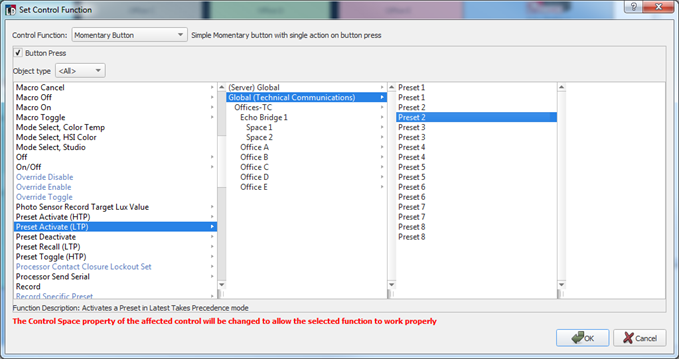
- Right-click on a button, fader control, or knob and select "Set Control Function" from the context menu. The "Set Control Function" dialog displays the control's current configured control function assignment, if any.
Alternatively, press (Alt) from your alphanumeric keyboard and click an indicator or control to set the control function using the Property Editor. Select multiple controls by pressing (Ctrl) + (Alt) and clicking additional indicators or controls to set shared properties in the Property Editor.
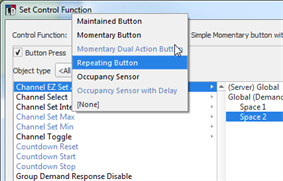
- Set the control function of the selected control from the "Control Function" drop down menu. When the control function is selected, the description of the control function displays next to the drop down list and the default action type (Button Down, Button Up, etc.) is selected and the object type list populates with the related object types for the selection.
-
The default action type is derived from the selected control and its default function.
For example, when a Paradigm Inspire Station button or knob control is selected, the default control function is set to "Momentary Triple Action Button", where three actions (Push, Double-tap, and Hold) are available for configuration.
- The object type control list(s) that displays in the Set Control Function dialog is dependent first on the user access level, next on the selected control function, then on the selected object type, and last on any filtering that may be applied in the "Object type" drop down.
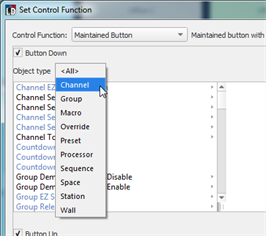
When a button is assigned a Maintained Button control function, additional properties display in the Property Editor that enable Paradigm to evaluate the state of the maintained button at boot. This feature ensures its associated action runs after the station is bound, even if the contact is open.
Configuring a knob control (Paradigm Inspire 4-Button with Fader only), the Knob Rotation action allows functional configuration of intensity, hue, saturation, color temperature, Studio Mode Adjust, and tint parameters.
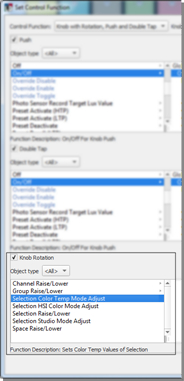
- Filter the available object control options in the list by selecting an object type from the "Object Type" drop down menu for each action.
-
For each default action type (Button Press, Button Action, Button Up, Button Down, Push, Double-tap, Hold, Turn On, Turn Off, etc.) that is defaulted by the control function, select the object type from the first column (e.g. Preset Activate (LTP). The second column of filtering criteria will populate depending on your selections. Continue selecting from the columns of data until the final object has been set.

For control functions that have more than one action (e.g. Momentary Triple Action Button, Maintained Button, Occupancy Sensor with Delay, etc.), be sure to set the control options for all actions.
- Double-click on the final object in the column or click [OK]. The Set Control Function dialog closes and the selected button or fader is labeled with the newly assigned action and the Property Editor displays the selected control functions.