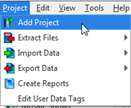
A server project must include at least one sub-project, but can include many. You may add a sub-project to a server project while utilizing the "New Server Project Wizard" and add more projects after server project creation using the Project menu.

Note: The "Add Project" option only appears when working within a Server Project.
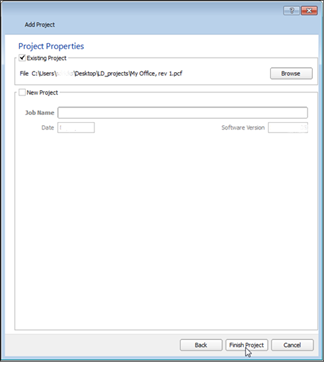
The Project Properties dialog found in the "New Server Project Wizard" provides the tools to add either an existing project or a new project to the server project.
When adding an existing project to the server project, click the "Existing Project" checkbox, then click the [Browse] button. Select the ".pcf" file to be added to the server project. Click [Finish Project] to complete the process. The server project opens, displaying the Plan workspace of the existing project previously added.

Note: When adding an existing project to the server project and the same project already exists as part of the server project, you will be prompted to resolve the inconsistencies of the incoming data against the existing data. You could choose to maintain the resident data in the server project or replace the data with the added project data. This process differs greatly from the Live Edit Synchronization, which will replace items based on time stamp or when the edit occurred, keeping only the most recent versions of objects.
When adding a new project to the server project, click the "New Project" checkbox, then supply a job name in the entry space provided. Click [Next] to proceed to the "Processor Properties and Data Import" dialog.
A sub-project can be added to a server project by selecting "Add Project" from the Project menu. Add an Existing Project that was previously created or you may "Add a New Project".