The layout spacing tool  is located in the toolbar with the layout proportion (size) tools
  . The layout spacing tool allows you to increase or decrease the spacing between the controls, in pixel increments. This tool works in conjunction with the layout proportion tools such as the [Layout Horizontal], [Layout Vertical], and [Layout Grid].
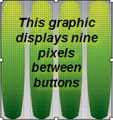
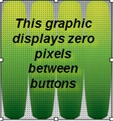
You can resize controls that have been laid out using the layout tools to fit within a bounding box. For example if you have four buttons selected and utilize the [Layout Vertical] tool, the buttons cluster together in a bounding box separated by the amount of pixels that are set in the layout spacing tool.


With the cluster of controls still selected, you can change the spacing between the buttons as needed, increasing the space between the buttons (raising the numeric value in the layout spacing tool) or decreasing the space between the controls (lowering the numeric value in the layout spacing tool). The bounding box remains the same size and in the same location, no matter what spacing is specified for between the controls.
TIP: Right-click on a control and select "Make the Same Size" from the context menu, to set the right-clicked control to the size of a previously selected control. For example, select button 1, right-click on button 2 and select "Make the Same Size". Button 2 will change to have the exact geometry of button 1.
 .
.
 is located in the toolbar with the layout proportion (size) tools
  . The layout spacing tool allows you to increase or decrease the spacing between the controls, in pixel increments. This tool works in conjunction with the layout proportion tools such as the [Layout Horizontal], [Layout Vertical], and [Layout Grid].
