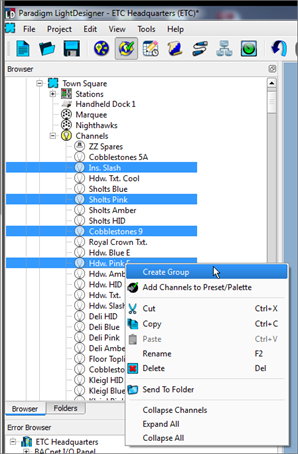
LightDesigner provides the tools to combine groups of channels or attributes that you want to have available for fast recall when programming or during control. Groups are used to correlate similar properties and allow them to be controlled, such as the pan parameter of the moving lights within a group or the intensity parameter of channels in a group.
Groups may be used as a selection tool or to apply other system functionality such as a preset, effect preset, sequences, and application of presets, etc. After group creation, additional tools are available for editing of the group including group contents selection, updating the group, adding and removing channels from the group.
Group edit features include "Select Group Contents", "Add Channels To Group", "Update Group Contents", and "Remove Channels From Group".
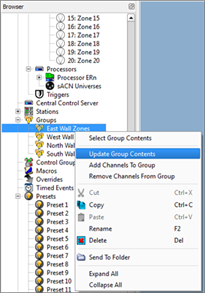
Knowing exactly which channels / parameters are included in a group can be easily resolved with the "Select Group Contents" feature. Simply right-click on any group node in the Browser and select "Select Group Contents" from the context menu. The channels that are included in the selected group will highlight in the Browser.
Update the contents of a group by selecting channels / parameters required (pressing (Ctrl) + click the individual channels to select more than one), then right-click on the group node in the Browser and select "Update Group Contents" from the context menu. The update replaces the group contents with the current channel selection.
Add channels to a group by selecting the channels required (pressing (Ctrl) + click the individual channels to select more than one), then right-click on the group node in the Browser and select "Add Channels to Group".
Remove channels from a group by selecting the channels to be removed (pressing (Ctrl) + click the individual channels to select more than one), right-click on the group node in the Browser and select "Remove Channels From Group".