DMX Gateway "Identity" Tab
The "Identity" tab displays the general settings for Net3 DMX Gateways.
Note: A Net3 One-Port DMX gateway will not display certain features on the "Identity" tab the other gateways display. Specifically, since the One-Port does not include an LCD the "Backlight" settings and the [Log Settings] button are not displayed. In addition, "Identify Gateway" section changes to Flash Network/Power LEDs and offers a [Flash LEDs] button.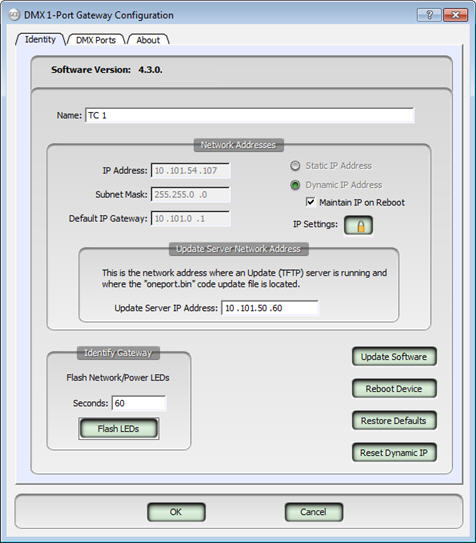
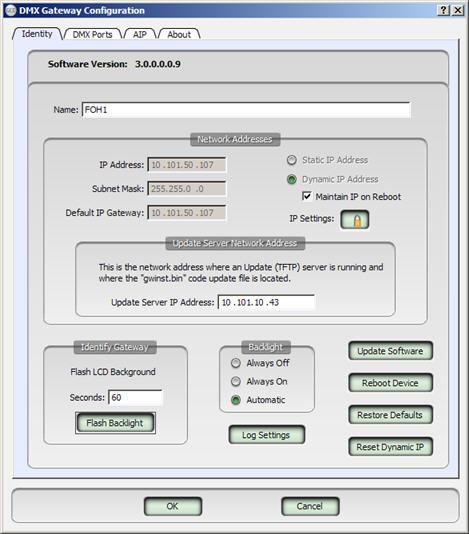
Note: This graphic above is representative of the dialog displayed when the selected device is from the "Online Devices" table. This dialog has limited options when the selected device is from the "Device Configurations" table. The sections below indicate these differences for you.
This displays the current full version number of software loaded in the gateway for reference only. The first three digits (3.0.0) are considered the normal software version number and the last three digits are ETC's internal development numbers.
The name of the gateway can be changed here. If the name is blank or the default generated name (for example ETCNet3GW4P00651b) is displayed, the physical gateway hardware will display its IP address on the LCD.
Tip: TIP: Be aware, the gateway LCD is only capable of displaying the first 20 characters of a name. You can assign a name that is longer, but it will be truncated by the display.
Note: Specifically for DMX/RDM gateway versions prior to version 3.0.0, if you want to turn on the DMX gateway LCD backlight, you will need to append the Name: of the gateway with ":on". Alternatively, you can set it to ":off" which will prevent the backlight from turning on even when you are utilizing the menu.
The gateway also supports ":auto" which is the same as having no append to the name. In auto mode, the backlight will come on with the first menu button press and turn off after the backlight times out.
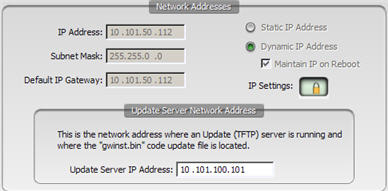
IP addresses are not editable, and display with a gray background, unless you have enabled IP editing by entering the password and the IP mode is set to "Static".
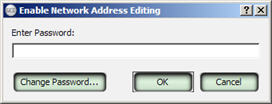
Enable IP editing by clicking on the IP Settings button ![]() . An "Enable Network Address Editing" dialog displays. Enter the password and click [OK] or change the password from this dialog.
. An "Enable Network Address Editing" dialog displays. Enter the password and click [OK] or change the password from this dialog.
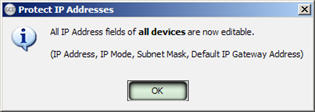
When network address editing has been enabled, you can change the settings for Static IP address and Dynamic IP address.
- If you choose to edit the Static IP Address, you can edit the network address fields of IP address, Subnet mask and Gateway IP address
- If you choose a Dynamic IP address, by default "Maintain IP on reboot" is selected which allows the gateway to maintain the initial DHCP served IP address for a period of time determined by the lease term set. With "Maintain IP on reboot" selected (checked), the gateway will not request another IP Address from the DHCP server when it reboots until the lease has expired. The default lease time is ten years.
Note: If your gateways are frequently used on multiple systems that use unique DHCP settings, be certain to "Reset Dynamic IP settings" when connecting to each network.

The "Update Server Network Address" section of the "Identify" tab is the network address is used by the Net3 gateway (if chosen in the update software dialog) to request software from a TFTP server (update service) that is expected to be running at that IP address.
Note: When editing an "Online Devices" table row, selecting any of the following buttons, [Flash Backlight], [Update Software], [Reboot Device], [Restore Defaults], or [Reset Dynamic IP], cause that action to perform immediately on the selected online gateway.
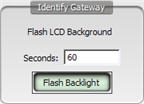
Note: This option is only available when the selected device is from the "Online Devices" table and is not available when the selected device is from the "Device Configurations" table.
The "Identify Gateway" section of this dialog can be used to easily locate a specific online gateway in an equipment rack or any other location where you can physically see the LCD screens of the gateways.
Specify the amount of time (in seconds) that you require the LCD backlight to flash and click the [Flash Backlight] button. The LCD backlight of the gateway you are connected to will flash "on" and "off" for the specified amount of time then return the LCD backlight to its previous state.

Choose the LCD backlight settings from the "Backlight" section of this dialog. Default setting is "Automatic" which turns the backlight on with the first menu button press and off again after the backlight times out.
Note: This feature is only available with a gateway running v3.0 and later code.
Note: This button is only active for gateway selected from the "Online Devices" table.
Clicking the [Update Software] button tells the selected devices to get new software from the IP address specified in the Update Server Network Address field. When the software is finished loading, the gateway will reboot into the new software environment.
Note: This button is only active for the gateway selected from the "Online Devices" table.
Clicking the [Reboot Device] button sends a message to the selected gateway telling it to reboot. This is a soft-reboot only and will cause the dialog to immediately close.
Note: This button is only active for the gateway selected from the "Online Devices" table.
Clicking the [Restore Defaults] button displays a "Warning: Property Reset" dialog.

Click [Yes] to reset the device properties to the factory defaults and reboot. Click [No] to cancel.
Note: This button is only active for the gateway selected from the "Online Devices" table.
Clicking the [Reset Dynamic IP] button deletes the current Dynamic IP address information and reboots the selected gateway. When the gateway reboots, a request is sent to the DHCP server for a new dynamic IP address. This will cause the dialog to immediately close.
