Navigate to the network and sharing center of your Visualizer PC by right clicking on the network icon on the windows desktop and select properties. If the network icon is not shown on your desktop then do a search for "network and sharing center" on your PC and click on the appropriate search result to open the network and sharing center window.
Click on "change adapters settings" located in the left hand pane of the network and sharing center window.
Ensure that the network adapter associated with the Ethernet port you connected the Cat5 cable to is enabled and assigned an IP address that is within the same sub-network as the console's FixtureNet port. This can be accomplished by assigning the network adapter a static IP address or by using a DHCP router in the network and assigning the network adapter to "obtain an IP address automatically". A typical static IP address configuration is shown in the image below.
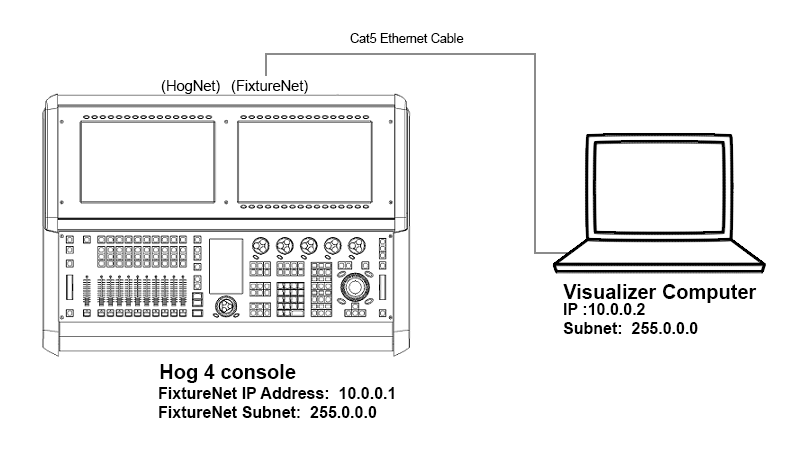
Note: In some cases it may be necessary to also right click and disable the other network adapters including bluetooth and wireless network adapters to ensure the visualizer application is sending data to the appropriate network adapter.
To configure WYSIWYG:
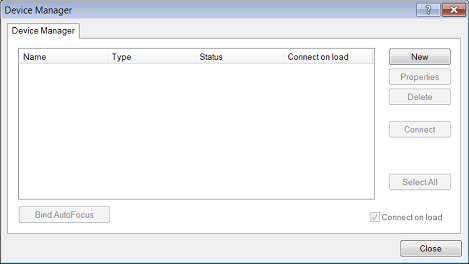
In WYSIWYG open the Device Manager : Live → Device Manager
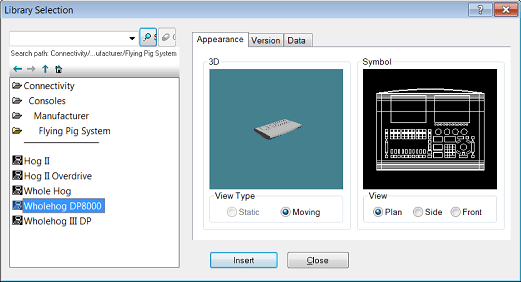
Click on New to add an additional device. Select Wholehog DP8000 as the new device:
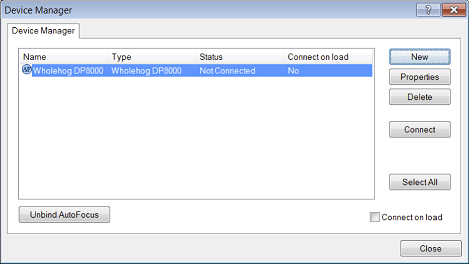
The device window will now display the Wholehog DP8000,
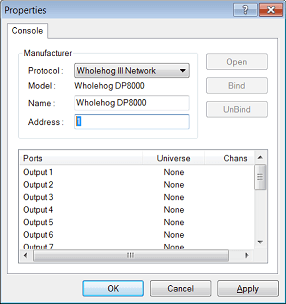
Double click on this device or select it and press Properties. The Properties window will open:
In the Address field enter a value of 1,2,3, or 4. If you enter a value of 1 then the output ports listed below will act as Hog visualizer outputs 1>16. If you enter an address value of 2, then the output ports displayed below will be interpreted as Hog visualizer outputs 17-32 although they are labeled output ports 1<16. Click OK to close this window.
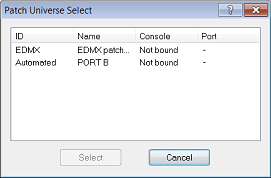
Bind the Hog output ports to the universes in your WYSIWYG show.
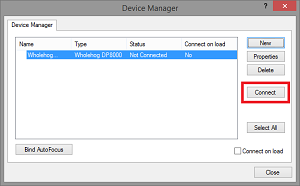
Once the universes are bound to the DP8000, press the connect button in the device manager window.
The DP8000 will now show a "connected" status which indicates that WYSIWYG is now ready to receive a visualizer data stream from a console. Please note that the "connected" status does not mean WYSIWYG is receiving a visualizer stream from a console. Proceed to Physically Connecting the Console to the Visualizer for instructions on how to configure the console to send a visualizer data stream into WYSIWYG.
![[Tip]](../images/tip.png) | Tip |
|---|---|
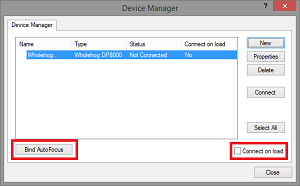
Select the "connect on load" option in the device manager window of WYSIWYG to avoid having to manually press the connect button each time you load that particular WYSIWYG project file. Also, click on the "Bind AutoFocus" option in WYSIWYG's device manager to enable the Autofocus feature described in Autofocus |
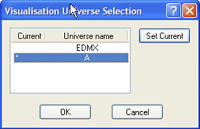
When using some versions of Console Edition (CE) WYSIWYG to connect directly to a Hog system only one universe of visualization is possible at a time. If your version of CE is limited to one universe, you will need to specify which universe is active within the WYSIWYG file:
Set the dmx provider in Vectorworks Vision to the Hog connectivity driver using the following steps:
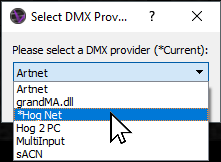
Click the "Dmx" option at the top of the Vision Window and select the "Change DMX Provider" menu option.

In the "Select DMX Provider" pop up menu select "Hog Net" and click okay.
Capture 2018 older:
Installation of the Hog Connectivity Driver on the visualizer computer is required.
On the console select the "Hog Connectivity" protocol and "Capture" manufacturer in the visualizer node settings
In Capture set the project console link and universe bindings to "Auto" or "Hog 3/4" when available.
Capture 2019 and newer:
Hog Connectivity and CITP protocols are both supported.
Installation of the Hog Connectivity driver is not required if the CITP protocol is used.
The CITP visualizer streaming protocol is compatible with Hog 4 OS consoles and both the Windows and Macinstosh versions of Capture as well as Presentation files generated by Capture v2019 and greater.
In Capture set the project console link to "Auto" and also set the universe bindings to "Auto".
