The playback and effect rate/tempo of a master (cuelist, scene, chase) can be adjusted several different ways:
Changing the playback and effect rate/tempo fields in the cuelist/scene options window: The simplest way to adjust the playback and effects rate/tempo of a master (cuelist, scene, chase) is to open the options window for that master and modify the playback and effect rate fields. Any modifications made to the playback and effect rate/tempo fields in the options window are stored and persisted for that cuelist/scene as the "base rate".
Holding choose and adjusting the main encoder wheels: Press and hold the Choose key for a master and use the parameter wheels to adjust the playback and effects rate/tempo. Any modifications made to the playback and effect rates via the encoder wheels are stored and will persist for that cuelist/scene as the "base rate".
Using the Rate Wheel: The wheel located on the left hand side of the console is known as the rate wheel. The rate wheel allows users to make temporary modifications to the base playback and effects rate/tempo for the chosen and selected masters. To toggle the rate wheel mode (playback, effect, none) press the rate key located below the rate wheel. The rate wheel's mode is displayed on the main playback bar (base rate + rate wheel modification). Moving the rate wheel in the upward direction will increase the selected rate while moving the wheel in the downward direction will decrease the selected rate. To clear the rate wheel's modifications for the active rate mode of the rate wheel press the restore key located above the rate thruster. You can also clear rate wheel modifications by holding choose for a master and pressing the encoder wheel button for the matching rate on the main encoder wheels. To permanently store the rate wheel's modifications for a cuelist/scene master hold the pig key and press the restore key. You can also permanently add the rate wheel's modifications into the base rate of a master by holding choose and turning the encoder wheel matching the rate on the main encoder wheel. Any rate thruster modifications that are not stored are be lost when the master is released.
Assigning the fader of the master to "Scale Playback Rate" or "Scale Effect Rate" in the cuelist/scene options window: Assigning the physical fader control of a master to "Scale Playback Rate" or "Scale Effect Rate" allows users to utilize the physical fader of the master to scale (multiply & divide) the base playback rate (or base effect rate) of the master. The middle of the fader travel always equals 1x scaling (no scaling applied) while moving the fader up or down adjusts the associated rate by multiplying/dividing against the base playback/effect rate. The upper and lower boundary options of the scale options determine how much scaling is applied as the fader is moved.
Assigning the button controls of the master to "Scale Playback Rate" or "Scale Effect Rate" in the cuelist/scene options window": Assigning any of the physical button controls of the master to "Scale Playback Rate" or "Scale Effect Rate" allows users to scale (multiply & divide) the base playback rate (or base effect rate) of the master with a single button press.
The effect size of a master (cuelist, scene, chase) can be adjusted several different ways:
Changing the effect size field in the cuelist/scene options window: The simplest way to adjust the effect size for a master (cuelist, scene, chase) is to open the options window for that master and directly modify the effect size field. Any modifications made to effect size field in the options window are stored and persisted as the "base size".
Holding choose and adjusting the main encoder wheels: Press and hold the Choose key for a master and then use the parameter wheels to adjust the effects size for the selected master. Any changes you make the base effect size for a master are stored and will persist as the "base size".
Assigning the physical fader of the master to "Scale Effect Size" in the cuelist/scene options window: Assigning the physical fader control of a master to "Scale Effect Size" allows users to utilize the physical fader to scale (multiply & divide) the base effect size of the master. The middle of the fader travel always equals 1x scaling (no scaling applied) while moving the fader up or down will begin to adjust the size of the effects playing back on the master by multiplying/dividing the base effect size of the cuelist/scene. The upper and lower boundary options of the "Scale Effect Size" option determine how much scaling will be applied to the master's base effect size when the fader is moved.
Assigning the button controls of the master to "Scale Effect Size" the cuelist/scene options window: Assigning any of the physical button controls of the master to "Scale Effect Size" allows users to scale (multiply & divide) the base effect size of the master with a single button press.
![[Tip]](../images/tip.png) | Tip |
|---|---|
Pressing an encoder wheel cell on the touchscreen while holding choose for a master will assign the physical fader for that master to the coordinating fader function (scale playback rate, scale effect rate, scale effect size, intensity). The current fader assignment of a master is indicated by a blue outline around the coordinating encoder wheel cell on the touchscreen. |
Effect Tap tempo is a mechanism that allows operators to set the cuelist/scene effect tempo by holding any choose key on the front panel of the console and tapping on the pause key of a master to set its effect tempo. As the tapping rate is captured, it is applied as the base effect tempo of the cuelist/scene.
Tap Tempo is most useful when the effects programmed into the master are recorded with effect rates that have beat equivalents.
Here are some common effect tap tempo examples:
An effect programmed with a rate of 60 bpm (1 beat) will perfectly match the tapped tempo
An effect programmed with a rate of 30 bpm (2 beats) will be 1/2 as fast as the tapped tempo
An effect programmed with a rate of 120 bpm (1/2 beats) will be 2x as fast as the tapped tempo
For more information regarding the beats construct of an effect refer to Beats.
You can assign any cuelist to be operated manually, allowing you to perform the cross-fades from one cue to the next manually using the fader. Once a cuelist's Manual Fade option is selected, the Master's fader will no longer control intensity but instead the cross-fade progress of all parameters from the current cue to the next; starting when moved from any end stop, finishing when the opposite end stop is reached.
If you select Manual Fader mode when the fader is at 50%, a manual fade cannot take place until the fader is moved to and then from an end stop, further moves from end stops will manually work through the cuelist sequentially.
To assign a cuelist's Manual Fade function:
Open + Choose → Options → Master
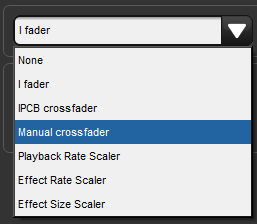
Select Manual Crossfader from the Fader menu:
Manual cross-fade mode will be indicated on the Playback Bar above the selected master by
 .
.
![[Tip]](../images/tip.png) | Tip |
|---|---|
You can still run cues to time when manual fader mode is selected by pressing the master's Go key. Note that you have no individual fader control of intensity and accidentally moving a fader will start to run the next cue manually. |
You can adjust the output values of any intensity, position, colour or beam parameter information in any cuelist by assigning its fader as a IPCB fader.
To assign a cuelist to use the IPCB fader function:
Open the Programmer from the Main Toolbar. In the Programmer select the fixtures and parameters that you wish to adjust with the fader, then assign a maximum level.
Record
1Enter : record the cue to the chosen master.Pig + Choose → Playback Options : open the options window for the cuelist's master.
In the Master pane, select IPCB Crossfader from the Fader drop down menu.
You can now adjust the value of the parameters contained in the IPCB fader cue by adjusting the master’s fader level.
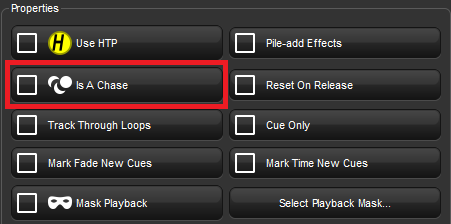
You can use a cuelist to make a chase. Any wait times are ignored, and each cue becomes a step in the chase where the rate is set in Beats Per Minute(BMP).
To use a cuelist as a chase:
The Playback Bar displays Chase and the playback rate (which defaults to 120 bpm):
Each cue step is by default equivalent to a beat, so to set a chase that advances every second the rate needs to be 60 bpm. By holding down the master's Choose key you can modify the playback rate, effect rate, and effect size on the parameter wheels:
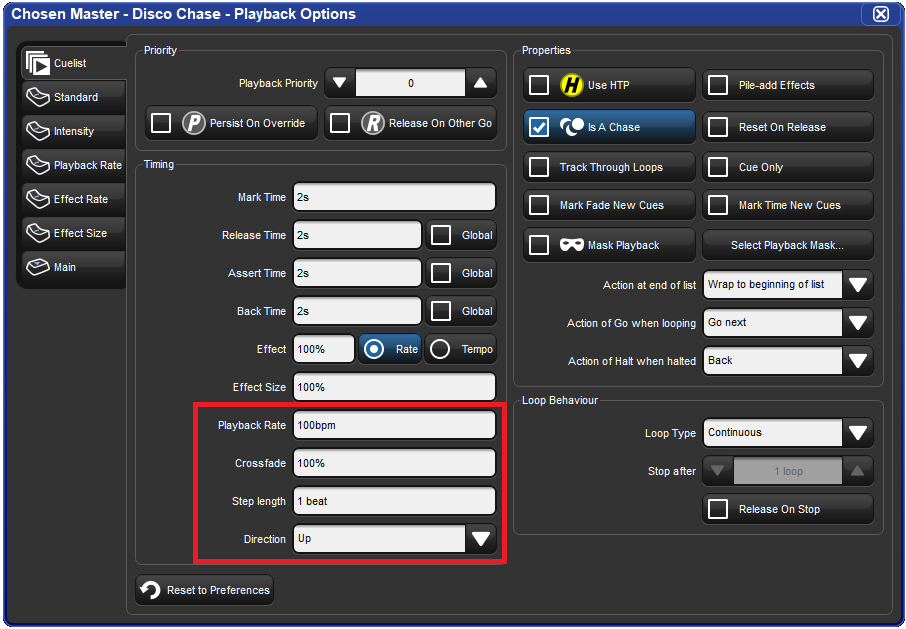
When you select Is a Chase the Cuelist pane of the Playback Options window, the following chase options appear:
Playback Rate: the speed of the chase defined in Beats Per Minute (bpm).
Crossfade: the amount of each step that a cross-fade is active for, as a percentage.
Step Length: by default each cue step is the equivalent to a beat. This is helpful when you enter a rate using Tap Sync, but then wish the chase to step at half or double speed. For more on Tap Sync, see Adjusting Chase Rate with Tap Sync.
Direction: four directions are available: Up, stepping up through cue numbers; Down, stepping down through cue numbers; Random, stepping randomly through cue numbers; and Bounce, stepping up then down through cue numbers.
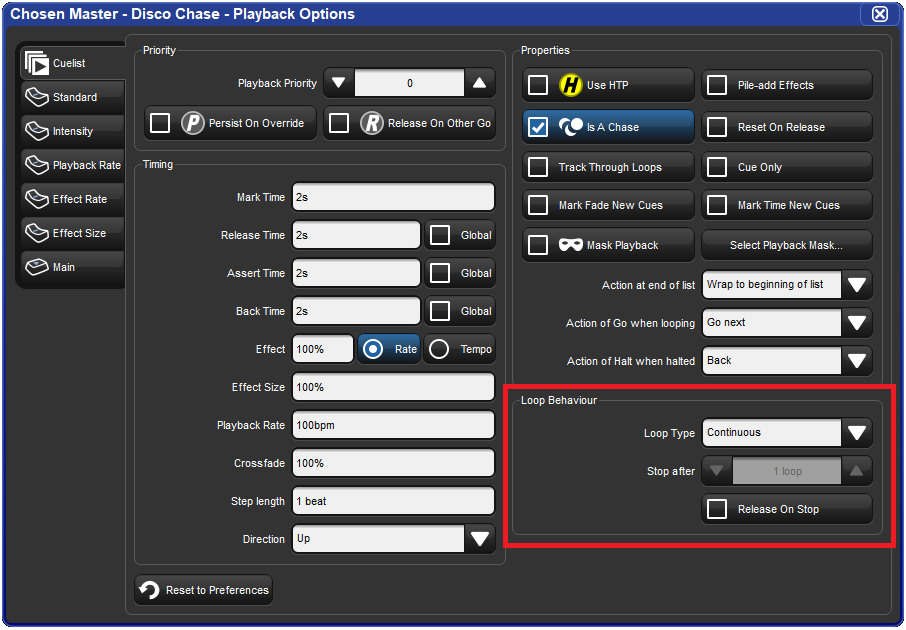
You can also configure the following loop types in the Cuelist pane of the Playback Options window:
Continuous: the chase steps indefinitely until paused or released.
Stop On Last: the chase stops at the last cue in the cuelist until released or triggered again with a Go.
Release On Last: the cuelist chase is released when it reaches the final step.
Stop On First: the chase completes one cycle and stops on the first cue until triggered again.
If any loop type other than continuous is chosen then you can assign the number of cycles the chase completes before the loop behaviour is actioned. Selecting Release on Stop releases the chase cuelist either when it stops because of an actioned loop behaviour or because of a manual stop using the Halt key.
![[Tip]](../images/tip.png) | Tip |
|---|---|
The Playback Options of a master can be quickly accessed by holding Pig and pressing the master's Choose key. |
A cuelist chase can be manually synced to a beat, such as a piece of music, using Tap Sync. Once synced Hog 4 OS maintains the chase rate until a new one is assigned.
To adjust the rate of a chase using Tap Sync, hold down the Choose key of the master the chase is attached to, while pressing the master's Go key repeatedly to the required beat. Hog 4 OS will learn the speed of the chase from you, in a minimum of two beats; after this, you can release the Choose key.
Note that you can only use Tap Sync with chases loaded onto physical masters, not virtual ones.
You can define how a cuelist deals with tracking in the Cuelist pane of the Playback Options window (shown in Figure 17.6, “The Cuelist Pane of the Playback Options Window”):
Open + Choose → Options → Cuelist
The options are:
|
Option |
Default |
Notes |
|---|---|---|
| Cue Only | Off |
Use this to run the cuelist without tracking. Any parameter that has no value in a cue will go to its default value, rather than tracking through from the previous cue. |
| Track Through Loops | Off | Determines whether parameter values track from the end of a loop back to the beginning. See Tracking Through Loops for a full description. |
You can use Trigger Macros to perform a variety of tasks when a cue runs. Macros are simple text instructions placed in the cue's Macro cell:
Open + Choose : open the Cuelist window.
Select the Macro cell for the desired cue, and press Set.
Type in the Macro command, then press Enter.
For a full description of the available macro commands, see Macros.
![[Tip]](../images/tip.png) | Tip |
|---|---|
You can display a list of available commands on the console by selecting the Macro cell in the Cuelist window and pressing the Set key. |
![[Tip]](../images/tip.png) | Tip |
|---|---|
You can enable trigger macros to occur when using the Back key to go backwards through a cuelist. |
You can mask which fixture function kinds that a cuelist or scene will playback by applying a playback mask to that cuelist or scene. Playback masking does not determine how data is recorded into a list or scene and does not change existing recorded data. Playback masking only determines which parts of the already recorded cue/scene data will be executed when that cuelist or scene is played. Follow these instructions to enable and configure playback masking for a cuelist or scene:
Pig + Choose : opens the options window.
Enable the Mask Playback button. A mask icon will now appear on the cuelist or scene in the directory window as well as on the playback bar.
Press the Select Playback Mask... button.
Select which fixture function kinds you want to enable for playback in that cuelist or scene. Kinds that are selected will play back. Kinds that are not selected will not playback.
Any changes made to a cuelist or scene's playback mask (including enabling/disabling the playback mask) will be reflected in output the next time that cuelist or scene is played or asserted.


