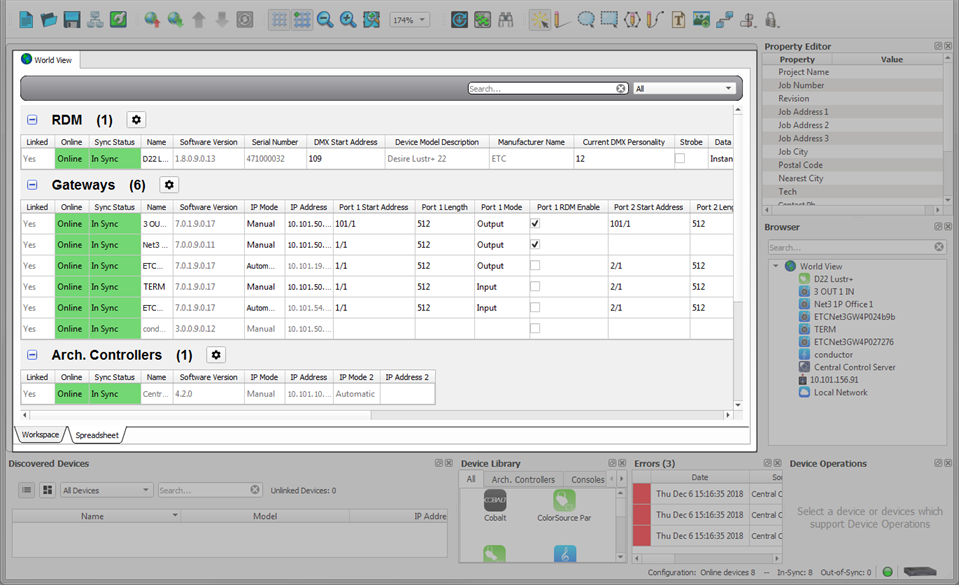
The data shown in the Spreadsheet view is a direct representation of the devices that are configured and shown in the selected system workspace. If a logical system is selected, only the devices for that selected logical system and its sub-systems (if any) display. Select the desired system from the Browser, or select a logical system tab from the main application view first, then switch to the Spreadsheet tab. The Spreadsheet tab, similar to the Workspace tab, also provides the ability to select a device and have the device properties display in the Property Editor for edit.
The Spreadsheet view is divided into device categories and displays both visual and text indication of the device linked, synchronization, and online status.

You can configure the columns that appear for each device category by clicking the  button that corresponds to the category title. From the Select Columns dialog, you can move columns around between the Available Columns and Displayed Columns section. Use the double and single right-facing arrows (A) to move all or just the selected columns, respectively, from Available Columns to Displayed Columns. In similar fashion, use the left-facing arrows (B) to move from Displayed Columns to Available Columns. Use the up and down arrows (C) to order the Displayed Columns. You can also drag and drop Displayed Columns vertically to change the order.
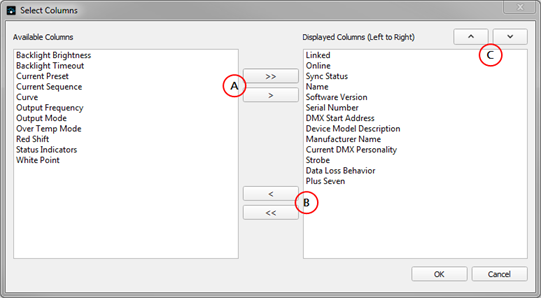
Note: The column selections you make will persist even after you restart the Concert application.
The majority of the columns that appear for your devices are device property columns, however, some of them display status information. These include the Linked, Sync Status and Online columns.
The Linked column in a device category displays the link status of the device. This status updates in real time when connected to a networked system and refers to whether the device in the configuration is associated with (linked to) an online device.
Displayed values include:
The Sync Status column in a device category displays by text status and color code the synchronized status of the device. This status provides indication when the values of the device on the network and the values in the Concert configuration differ.
Displayed values and color code includes:
Note: To synchronize the network devices and the Concert configuration, use the provided [Synchronize Configuration] button in the toolbar, or select See "Synchronize Configuration" from the Network menu.
The Online column in a device category displays the online/offline status of the device.
Possible values and color codes include:
Context menu options are provided in the Spreadsheet view including device specific actions that are determined by the specific device package. Right-click on a device in the Spreadsheet to display the context menu options for the device.
For example, a Gateway context menu provides options to configure the gateway ports, link to or unlink from the network device, send or receive the device configuration, identify an RDM device, and delete the device from the configuration.
From the Spreadsheet tab, you can sort the displayed device category table data in ascending or descending order. For example, click the column header "IP Address" to sort all devices in that device category by the IP address.
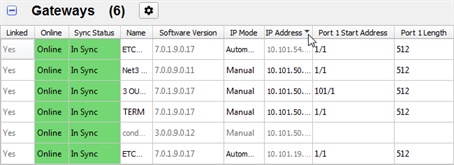
The column header displays a character next to the title which defines which sort was applied to the table:
Note: Re-sorting the data in the tables does not affect the configuration.
Column widths default to fit the header name provided. To change the column width, place the mouse cursor on the line between two columns in the column header. The pointer changes to a double-headed arrow.
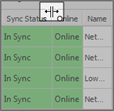
Click with the left mouse button and drag the double-headed arrow to widen or narrow the column.
Click on a device category header to expand or collapse that section in the Spreadsheet view.
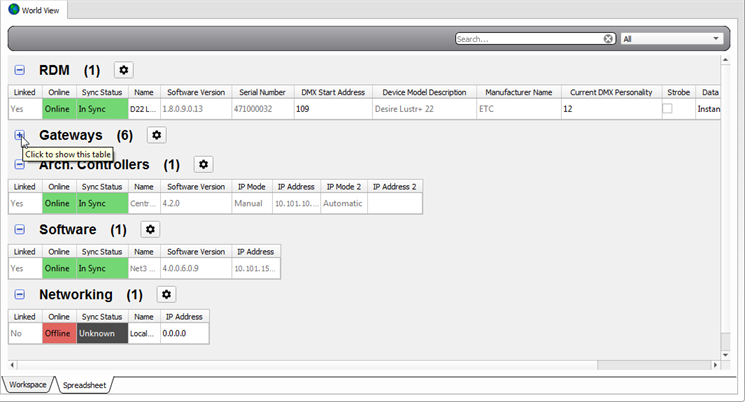
Columns within each device category in the Spreadsheet view can be rearranged. Simply click and drag a column by its header row to its new location in the spreadsheet. Column arrangement will reside with the configuration.
Click anywhere in the row of data to select a device property for edit. Object selection tracks within the Browser, and the Property Editor populates with the selected device property data. Double click inside a cell to edit its text properties or select from the drop down or selection box when provided.
Only certain properties can be edited. Any property that cannot be edit displays with a gray tint to the text.
Navigation within the spreadsheet is simple and can be done using your mouse cursor or by using the left (←), right (→), up (↑), down (↓), Enter, Tab and F2 keys on your keyboard. Use F2 to edit the selected cell and Enter to confirm the selected value.
When a property has been edited and the property values differ between your instance of Concert and the network, the cell appears with a light blue tint. This provides a simple visual indicator that the device property has changed but has not yet been resolved across the network. If you hover your mouse cursor over the changed property, the values that are local and on the network are displayed. The local value is what you have edited in Concert and the network value is what is currently configured on the device. Synchronizing your device causes the local value to push to the network.
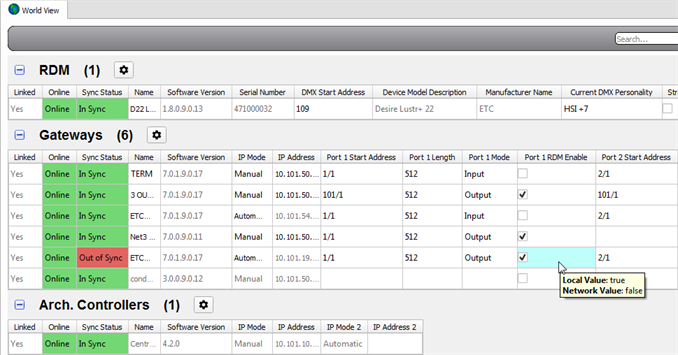
Standard Windows® table editing conventions may be used including cell selection, copy, cut, delete, paste and range select.
Note: Multiple cell selection and range select may be used only in a single device category. You cannot select multiple devices from different device categories for edit.
The Spreadsheet view provides a Search field to quickly locate devices in the list by name, filtering out all other devices in the list. The search feature performs a case insensitive search of the device Name. Clearing the Search entry field restores the full content of the Spreadsheet view.